
Enable Internet Information Services (IIS)
The first step is to enable the Internet Information Services (IIS) server on your machine. Here’s how you can do it:
- Navigate to the Control Panel on your Windows machine.
- Click on “Programs.”
- Select “Turn Windows Features On or Off.”
You’ll see a pop-up window with a list of features. Ensure the following checkboxes are enabled:
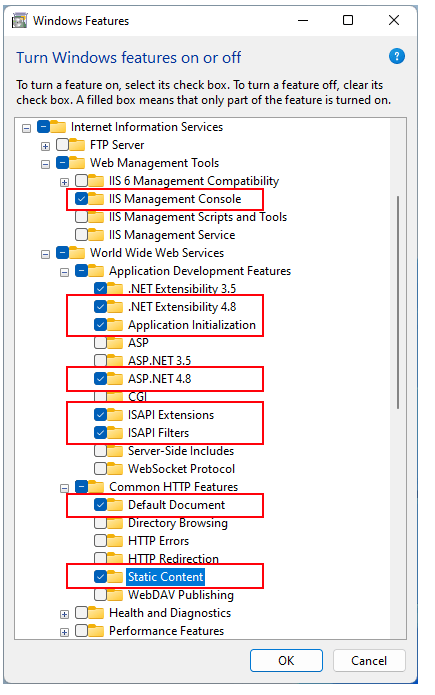
Install WebDeploy
Download and install the WebDeploy_amd64_en-us from the below link:
https://www.microsoft.com/en-us/download/details.aspx?id=43717
Install .NET Framework and .NET SDK
Download and install the .NET Framework and SDK from the below link:
https://dotnet.microsoft.com/en-us/download/dotnet-framework/net48
Download runtime and developer pack both.
Install SQL Server
Sitecore uses SQL Server for its database. Follow these steps to install SQL Server (Express version):
https://www.microsoft.com/en-us/sql-server/sql-server-downloads
During the installation, select the Custom installation option. Set the path for the setup files and proceed with the installation.
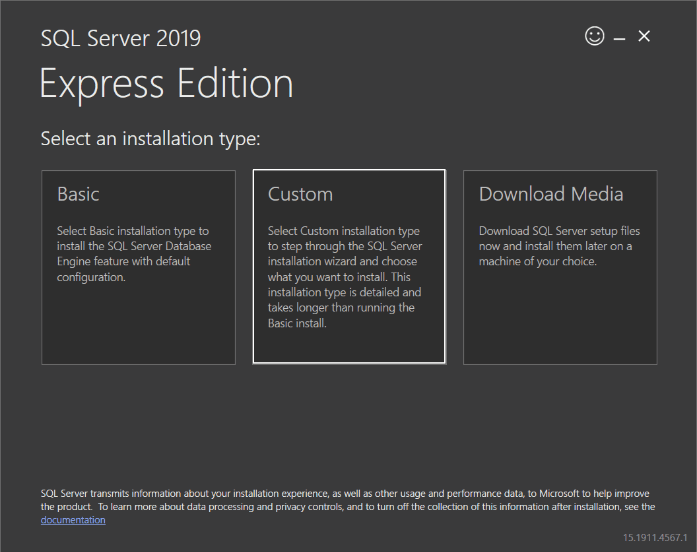
We willl set the path of the setup files to be downloaded and then click the install button:

The downloading process will be started.

Now, we will select the New SQL Server stand-alone installation or add features to an existing installation option to start the installation:

Accept the license terms

The Global Rules screen will be launched and, the SQL Server Setup will be checked the computer configurations:

The Product Update screen checks the latest updates of the SQL Server Setup

In the Install Rules screen click the Next button.

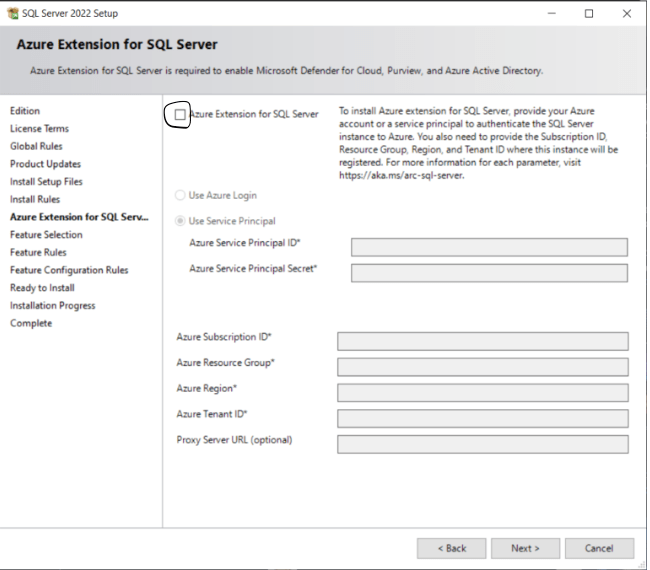
A new page is the Azure Extension for SQL Server, Uncheck on Azure Extension for SQL Server check box if it is checked :
In the Feature Selection screen select the following Features:
- Database Engine Services
- SQL Server Replication
- Or you can chek all if needed.

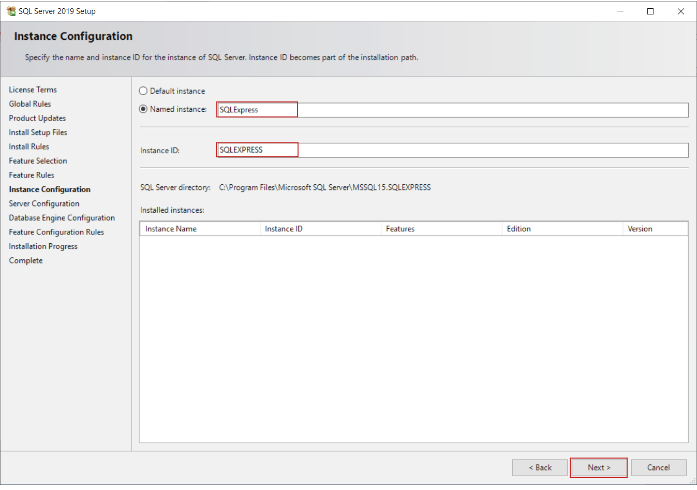
In the Instance Configuration screen, we will give a name to the SQL instance but we will not change the default name of the installation. Click the Next button:
Then you can configure the service account. Typically I leave everything as the default.
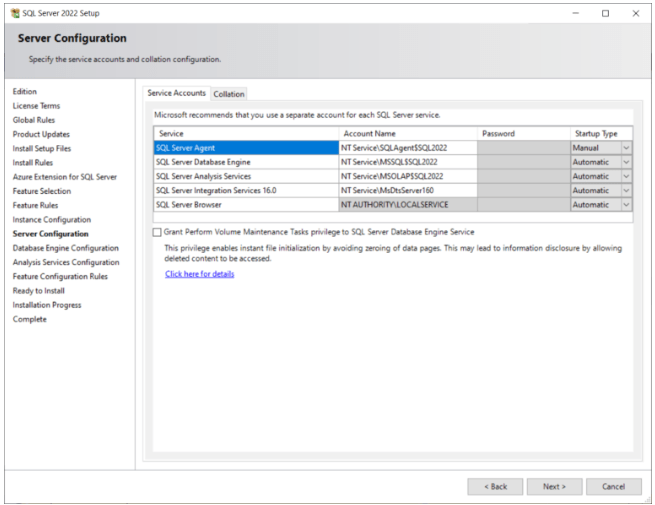
In the Database Engine Configuration screen select the Mixed Mode and provide the password (store the password for future requirement.) which we will us in SQL server management studio to login sa user. And click the Next button.

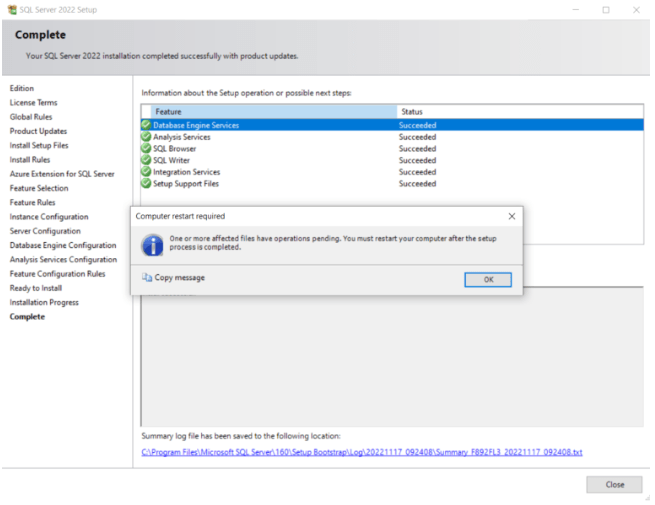
We’re almost done. We get a final overview and then we can click on the Install button.

Grab a Tea or Coffee of your choice and wait till the installation finishes.

After some time, the setup (hopefully) finishes successfully. You might get the pop-up window for restart your PC.
Install SQL Server Management Studio 2019
Download and install the SQL Server Management Studio 2019 from the below link:
Select Install

To enable sa user in SSMS follow below page:
Test connection to SQL Server Express
Once you install and enable the sa user check with it login credentials.

Download Sitecore 10.3 xp
In below link you will find the Setup of Sitecore 10.3xp as well lincence file and all the other setup which are requires to install Sitecore in your machine.
Unzip the sitecore 10.3 package.
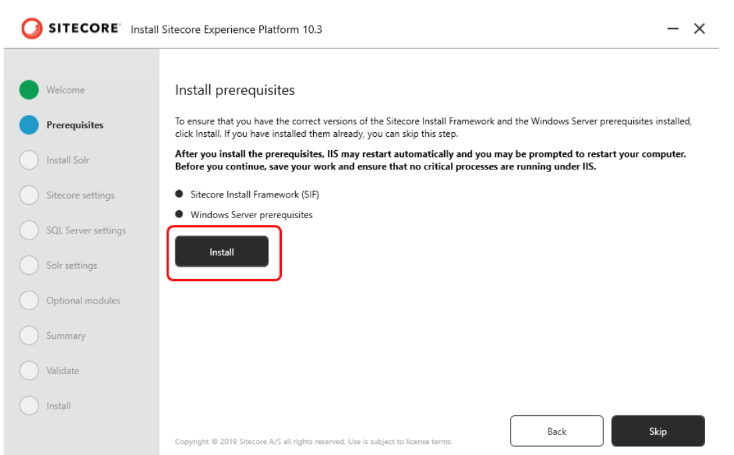
- Double-click on the Sitecore setup you will see the below screen.

- On Prerequisite screen click on Install button. This will install various components, such as .Net Framework 4.8.0, essential Windows Server prerequisites including IIS, as well as other required modules.
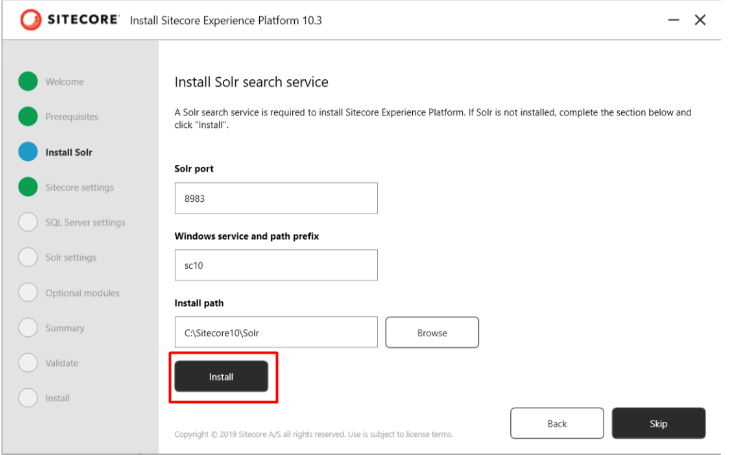
- Solr search service and then proceed by clicking the Install button. This action will initiate the installation of Solr version 8.11.2 on your system.
- Solr Port: 8983 (Ensure the port is available and not in use)
- Windows Service and Path Prefix: You can choose your preferred prefix
- Installation Path: Default is C:\Solr (You can browse your preferred path)
Once the Solr search service successfully installed click on Next .
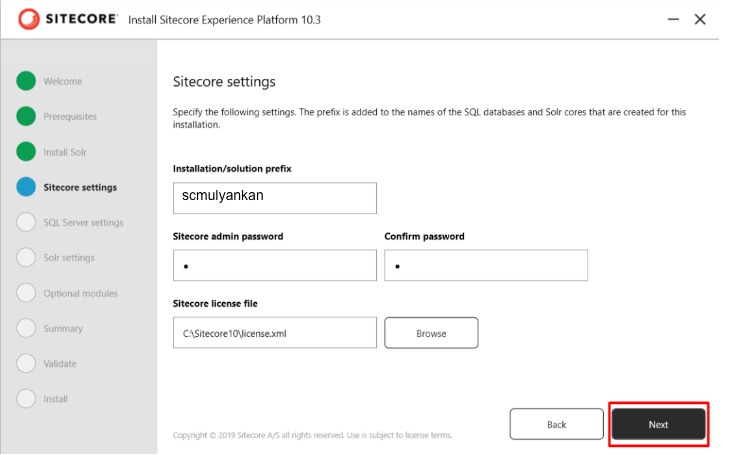
- Input the Sitecore configurations and then proceed by selecting the Next .
- Installation Prefix: Name of the Sitecore instance
- Sitecore Admin Password: Use ‘b‘ 😄 or as your preferance.
- Sitecore License File: Choose the license file which is already in the setup folder
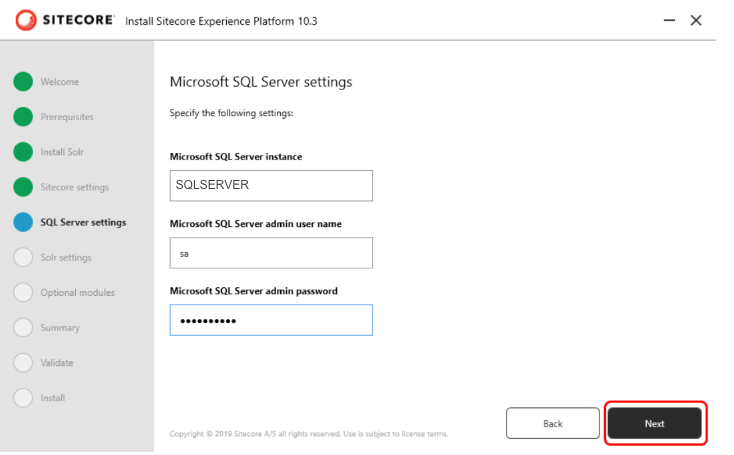
- Input the SQL server details and proceed by clicking Next.
- SQL Server Name: SQLSERVER or whatever your SQL server name is.
- Microsoft SQL Server Admin User Name: sa
- Microsoft SQL Server Admin Password: [Enter the password]
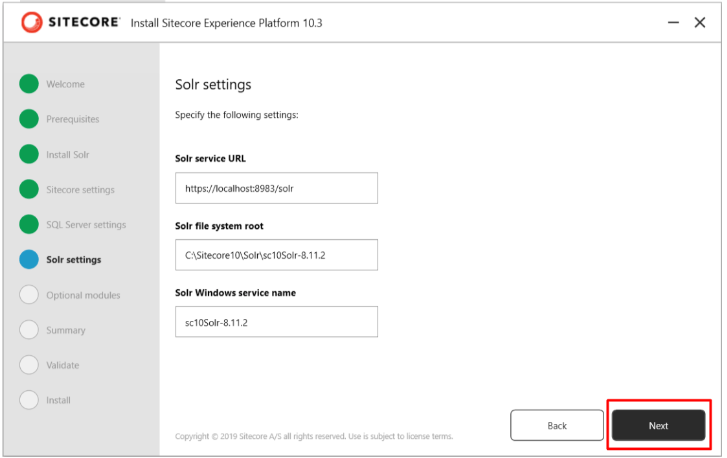
- Solr details will be auto-populated. If not, enter the SOLR details and click Next.
- Solr Service URL – Local Solr URL, For example – https://localhost:8983/solr
- Solr file system root – Go to C:\Solr or the path you used earlier and copy solr path

- If necessary, you can choose to select the checkbox for Sitecore SXA modules, and then proceed by clicking Next.

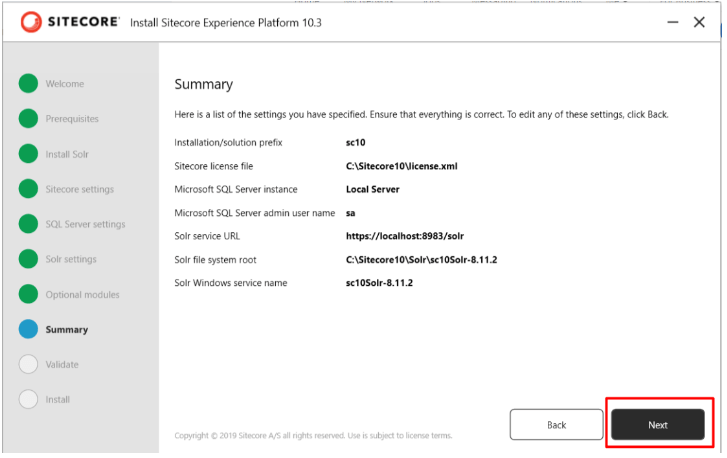
- Examine the summary and then proceed by selecting Next.
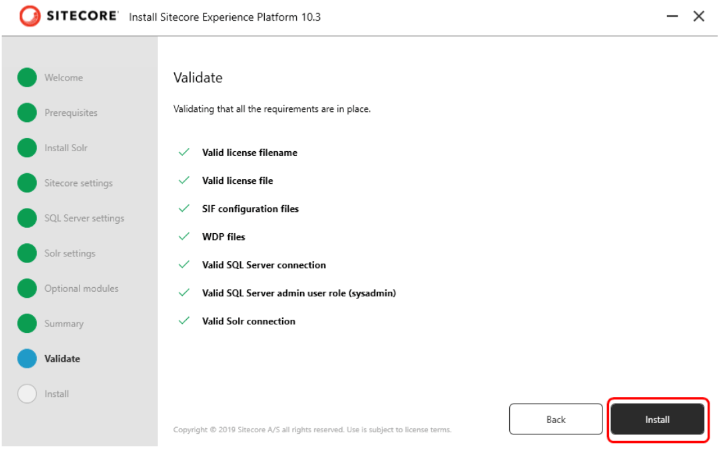
- Validate and click on Install
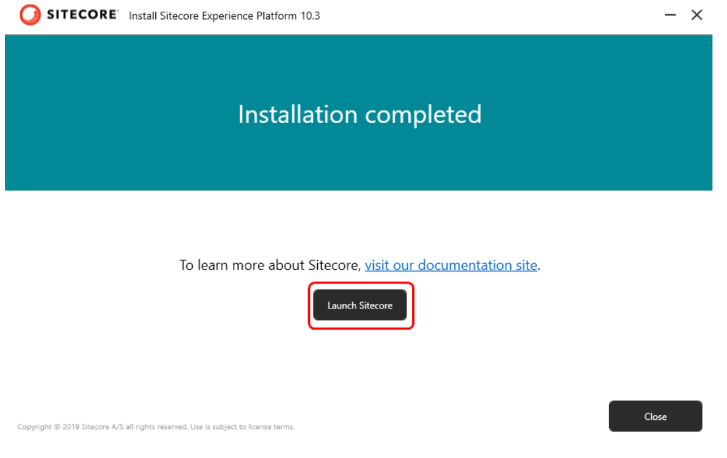
- Once the installation completed click on Next.

Now click on Launch Sitecore.
Now, access Sitecore by logging in using the administrator password you provided in 4th step:
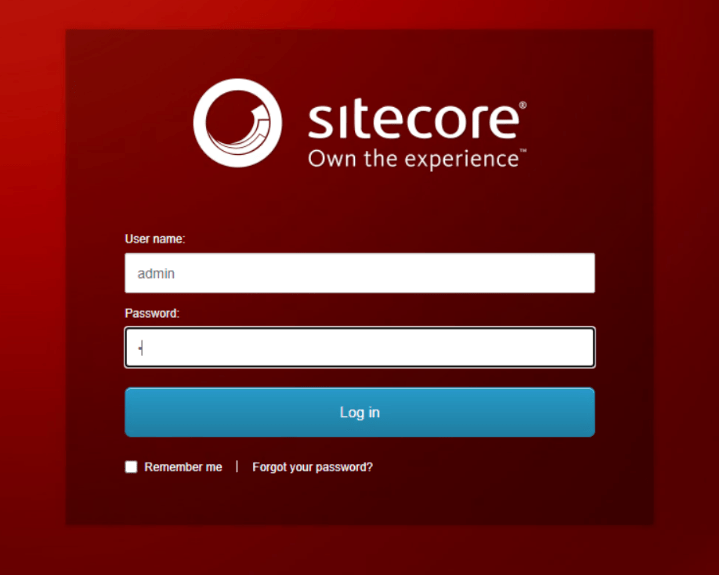
That’s it! You’re now ready to explore Sitecore and start building applications. Enjoy your Sitecore journey! 🚀🎉


Leave a comment