Introduction
In today’s digital landscape, personalized user experiences are no longer a luxury but a necessity. Sitecore’s search recommendation system offers a powerful way to enhance user engagement by delivering relevant content and products to your website visitors. This capability not only improves user satisfaction but can significantly impact conversion rates and average order values
This guide will walk you through the process of implementing Sitecore search recommendations on your website, from creating a recommendation widget in the Customer Engagement Console (CEC) portal to integrating it into your Next.js application. By the end, you’ll have a solid understanding of how to leverage Sitecore’s recommendation engine to create tailored experiences for your users.
1. Creating a Recommendation Widget
To begin implementing Sitecore search recommendations, you’ll first need to create a widget in the CEC portal:
- Navigate to the Widget section in the CEC portal and click on
Add Widget

2. Select Recommendation as the Widget Type

3. Set up the widget with the following parameters:
WIDGET NAME : Choose an appropriate name for your widget
RFK ID : Assign a unique RFK ID that will be used to render your widget
VARIATION NAME : Add your default variation (you can add more variations later based on requirements)
WILL BE USED IN : Select from one of three options (For example, choose “common across all pages” to enable the widget on all pages)
Grouping : Set to true by default, can be changed if not needed

- Select a recipe based on your requirements
- What is a Recipe?: A recipe determines how results are generated based on the data fed during widget rendering, using context (User or site)
- You can set context using
PageController.getContext().setIds
- You can set context using
- What is a Recipe?: A recipe determines how results are generated based on the data fed during widget rendering, using context (User or site)

5. Review your configuration, click Save, and then publish the widget
2. Customizing Widget Configuration (Optional)
After creating your widget, you may want to customize its behavior. The widget variation settings allow you to modify how recommendations are generated and displayed:
Navigate to your created widget and follow this path: Widget Variation → Default → Rules → Add Rule
In the top navigation, you’ll find options to add or modify rules (select the product as the output entity)
- Configure the
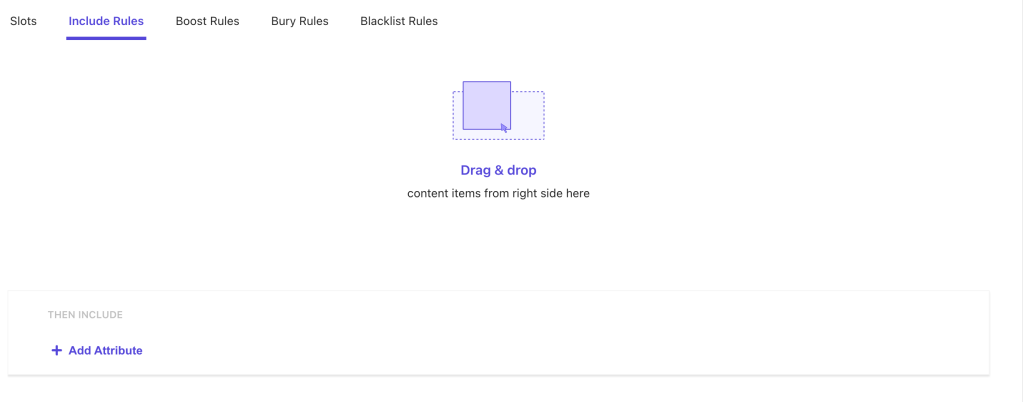
Slotssection to customize specific product recommendations: There are several rule types you can implement:

There are multiple options like Include , Boost , Bury Current , Blacklist Current etc.
you can change the settings based on requirements.
- Include Rules: This rule provide the facility to include some specific products based on the
Include Ruleattribute. - Boost Rules: You might want to present certain products before others in case of excess inventory or a promotion.
- Bury Rules: To force products to the bottom of the results, you can bury them.
- Blacklist Rules: To skip certain products in the results, you can blacklist them.
After adding the rule click on save and then publish the widget.
This is the highlight of the CEC portal configuration. let’s see how you can use it from application side.
3. Next.js Integration
Once your widget is configured in the CEC portal, you’ll need to integrate it into your Next.js application:
- Create a new component called
RecommendationProducts(or another name of your choice) - Implement the component using the following code structure:
const RecommendedProduct = (): JSX.Element => {
	const {
	    widgetRef,
	    actions,
	    queryResult: { isFetching, isLoading, data: { content: products = [], total_item = 0 } = {} },
	  } = useRecommendation({
	    state: {
	      itemsPerPage: 24,
	    },
	  });
	  return (
		  <div ref={widgetRef}>
			  //add the code to return the desire output
		  </div>
	  )
  }
you need use useRecommendation for the Recommendation. also can add some initial configuration as i set the itemsPerPage state for maximum result limit.
3. Export the widget using the widget wrapper:
const RecommendedProductWidget = widget(
  RecommendedProducts,
  WidgetDataType.RECOMMENDATION,
  'product'
);

export default RecommendedProductWidget;
Create a new file to render the widget:
import RecommendedProductWidget from 'src/helpers/ProductRecommendation';

return (
      <RecommendedProductWidget
        rfkId={'rfk_RecPDP1'} //provide the rfk_id that you have created in CEC portal
      />
  );
};
Conclusion
This is how the basic steps to create and render your Recommendation widget, you can add more variation as well and add different rules for it and can make them as default variation as well. Other thing is you can also render this component using the Sitecore side and can provide the configuration inside the component datasource for content authorable.
You can create multiple variations of your widgets, implement different rules for different scenarios, and even render components directly from Sitecore with content author configurations. This versatility allows you to continually refine your recommendation strategy based on user behavior and business objectives.
As you become more familiar with the system, consider experimenting with different recipes and rules to find the optimal recommendation strategy for your specific use case. Monitor performance metrics closely and iterate on your approach to maximize the impact of personalized recommendations on your digital experience.
By leveraging Sitecore search recommendations effectively, you’re not just improving your site’s functionality—you’re creating more meaningful, personalized interactions that can significantly enhance customer satisfaction and drive business results.


Leave a comment