
Range facets are powerful tools for filtering numerical data like prices, dates, or quantities in your search interface. This guide walks through implementing a range facet in Sitecore Search and integrating it with a Next.js application.
Part 1: Configuring Range Facets in Sitecore Search
In first step , we will create a “range” facet in Sitecore Search, In my dataset I have party_price attribute field, which is already configured within Sitecore Search. These attributes are readily accessible through the Domain Settings,
which you can find from Administration → Domain Settings → Attributes
Then you need to select a product entity or All from Entity dropdown
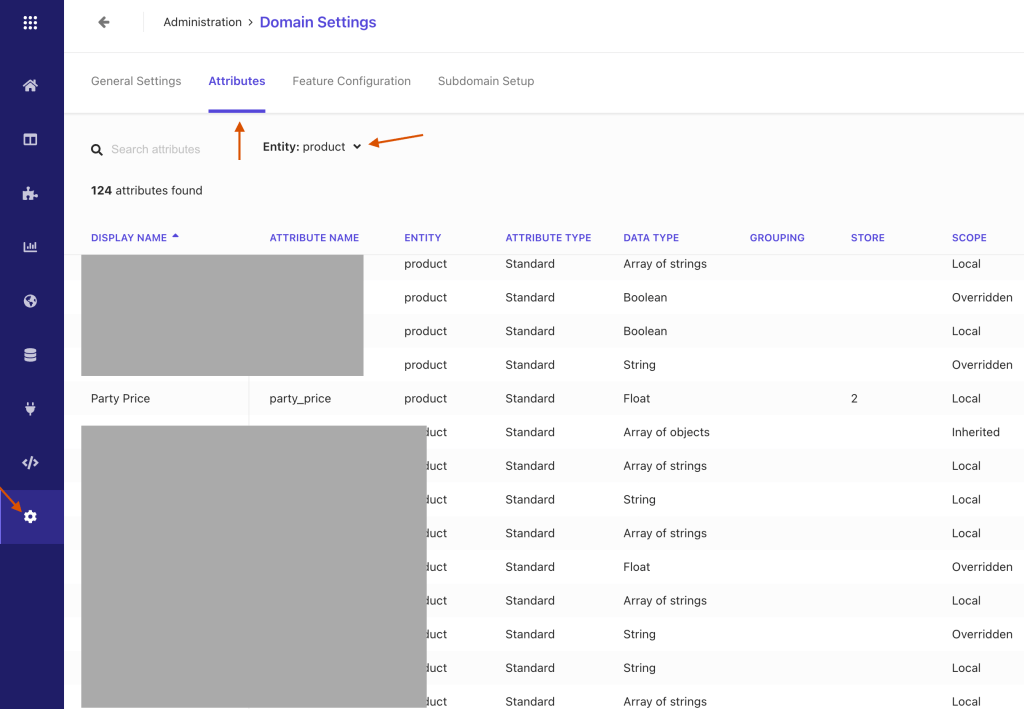
Click on party_price field
you will find some configuration inside it

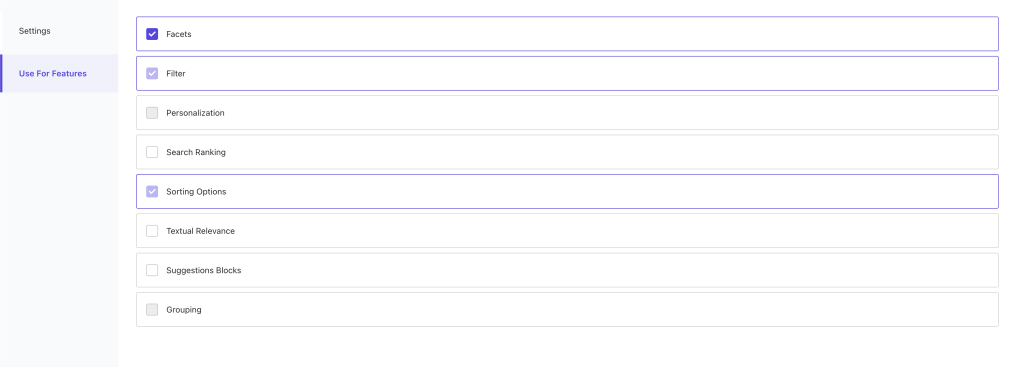
To use this field as facet, navigate to the Use For Features and check the Facet checkbox
Save the changes and publish it. (Most forgettable 😄)
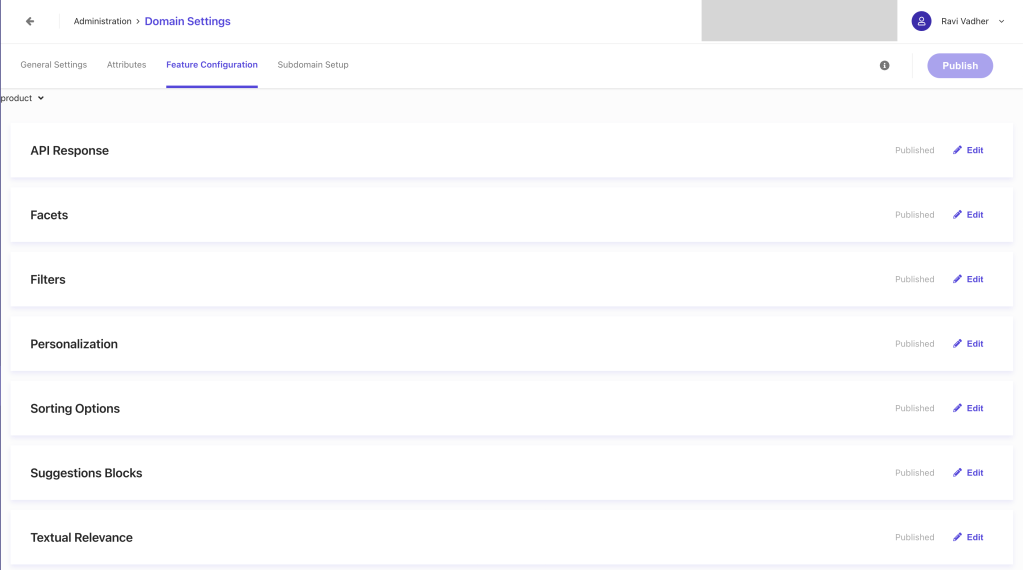
Now, our next step is to configuring our Facet , so for that we will again navigate to Domain settings and then click on the Feature Configuration
You can see list features like, API Response, Facets, Filters, Personalization etc. As we want to configure the Facet will navigate to the Facet feature.
From the facet list you can find the newly created facet in my case It will be party_price

click on the party_price facet for configuration.
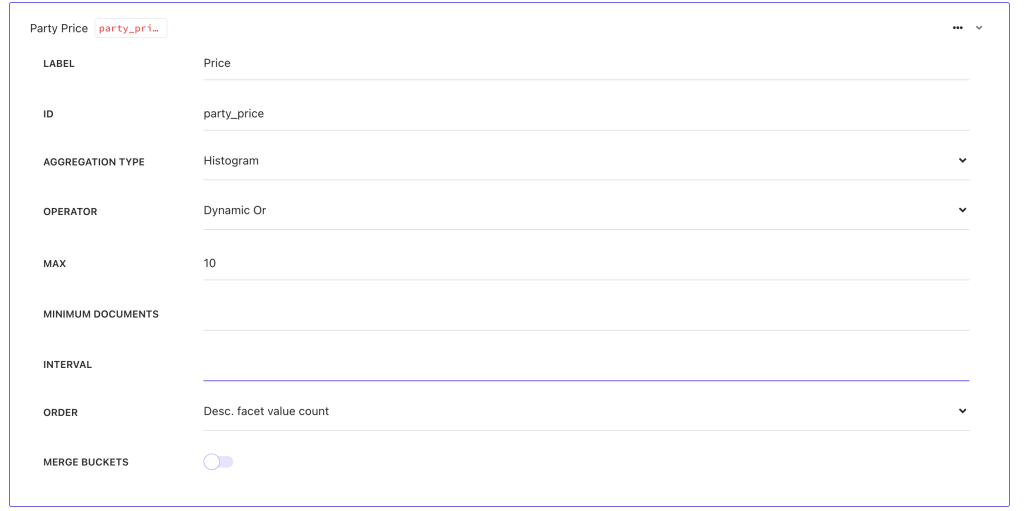
- Ensure that:
AGGREGATION TYPEis set to Histogram.OPERATORis set to Dynamic OR.
- Save and publish the changes.
I’m skipping the Sitecore Configuration part as this is all about the “Range” facet. (I’ll cover in Facet configuration part).
This is all from Siirecore Search facet configuration. Now we’ll jump into Next js configuration part.
Part 2: Implementing Range Facets in Next.js
Configure Search Results Widget:
To setup the range filter first of all you need to pass the config while calling the useSearchResults widget.
const searchResults = useSearchResults<ProductSearchResultModel, InitialState>({
    config: {
      facets: {
        party_price: { type: 'range' },
      },
    },
in above code snippet you can see I have configured the party_price as type of range. If you are not configure the specific type it would behave differently !
Create the Range Facet Component:
Now we will create the Price Facet Component where we will implement our facet things.
const PriceFacet = ({ facet }: FacetProps) => {
  const min = Math.floor(facet?.value?.[0].min);
  const max = Math.floor(facet?.value?.[facet?.value.length - 1].max);
  return (
    <SearchResultsFacetValueRange
      max={max}
      min={min}
      autoAdjustValues={false}
      className={clsx(styles['sitecore-range-facet-root'], '!mt-4')}
    >
      <RangeFacet.Track
        className={clsx(
          styles['sitecore-range-facet-track'],
          '!block !bg-color-brand-primary-1-base !h-2'
        )}
      >
        <RangeFacet.Range className={clsx(styles['sitecore-range-facet-range'])} />
      </RangeFacet.Track>
      <RangeFacet.Start
        className={clsx(
          styles['sitecore-range-facet-start'],
          'hover:!bg-white hover:!border-[1px] hover:!border-color-brand-primary-1-base '
        )}
      >
        {(value) => <span className="!top-[-20px]">${value}</span>}
      </RangeFacet.Start>
      <RangeFacet.End
        className={clsx(
          styles['sitecore-range-facet-end'],
          'hover:!bg-white hover:!border-[1px] hover:!border-color-brand-primary-1-base '
        )}
      >
        {(value) => <span className="!top-[-20px]">${value}</span>}
      </RangeFacet.End>
    </SearchResultsFacetValueRange>
  );
};
You can also override the style based on you desiIn requirement in is codebase i’m using some tailwind 🧑🏻🎨 classes for customisation.
Render the Range Facet Conditionally:
As this is range facet, for rendering it we have to do one additional check while rendering the regular facet.
<AccordionFacets.Facet
      facetId={facet.name}
      key={facet.name}
      className={facetRoot({ className: 'border-b-[0px]' })}
    >
      <FacetHeader facet={facet} actions={actions} settings={settings} />
      <AccordionFacets.Content>
        {facet.name === 'party_price' ? (
          <PriceFacet facet={facet} actions={actions} settings={settings} />
        ) : (
          <StandardFacet facet={facet} actions={actions} settings={settings} />
        )}
      </AccordionFacets.Content>
    </AccordionFacets.Facet>
As of now i’m compering with the static value, but there is also an other way to do this.
Build a Custom Range Label:
Here some more things to keep in your note that we also have to create separate label for the range it will not work like other facet.
for that you can export the function and can reuse it.
export const buildRangeLabel = (min: number | undefined, max: number | undefined): string => {
// Constructs the label string for the range (e.g., "$10 - $100", "< $10", "> $100").
  return typeof min === 'undefined'
    ? `< $${max}`
    : typeof max === 'undefined'
    ? ` > $${min}`
    : `$${min} - $${max}`;
};

export const buildFacetLabel = (selectedFacet: any, overridenLabel: string) => {
  if ('min' in selectedFacet || 'max' in selectedFacet) {
    return `${buildRangeLabel(selectedFacet.min, selectedFacet.max)}`;
  }
  return `${overridenLabel}`;
};
here i’m also passing the overridenLabel if you want to override the existing label from Sirecore CMS side. otherwise you can remove it.
Implement a Custom Facet Header:
as I’m using separate FacetHeader component i’ll be going use buildFacetLabel for dynamic label. (which are shown as selected facet at top of the facet section)
//Implement a Custom Facet Header
function FacetHeader({ facet, actions, settings }: FacetProps) {
  const selectedFacets = useSearchResultsSelectedFacets();
  const selectedFacetIds = selectedFacets.map((x) => x.id);
  const isFacetSelected = selectedFacetIds.includes(facet.name);
  const dictionary = useDictionary();
  return (
    <AccordionFacets.Header className={'flex flex-col justify-between'}>
      <AccordionFacets.Trigger className={styles['sitecore-accordion-trigger'] + ' group'}>
        <span className={facetLabel()}>
   -->     {buildFacetLabel(selectedFacets, settings?.facetLabelOverride || facet.label)}
        </span>
        {isFacetSelected ? (
          <span
            className={clearLabel()}
            // This is a span instead of a button because we are already inside a button
            onClick={(e) => {
              e.stopPropagation();
              return actions.onRemoveFilter({ facetId: facet.name, type: 'range' });
            }}
          >
            {dictionary.getDictionaryValue('ClearFacetPLP', 'Clear')}
          </span>
        ) : null}
        <IconHelper className={facetIcon()} icon={'chevron-down'} />
      </AccordionFacets.Trigger>
    </AccordionFacets.Header>
  );
}
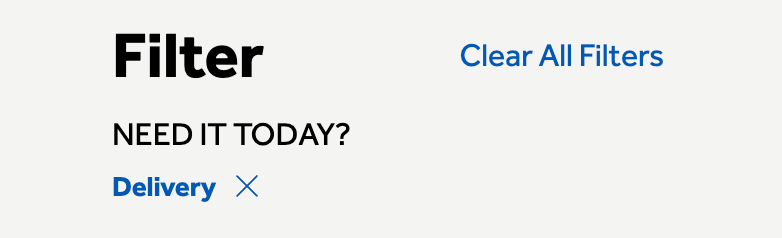
Final result 🥳

You can also deep dive some additional configuration ⚙️
Default facet selection
To set the selected filter on the url (so, you can use as default selected filter on page load), we can do something like:
function facetToUrl(selectedFacets: FacetValue[]) {
// Converts selected facets to a URL hash string.  Handles range facets specifically.
  if (!selectedFacets.length) {
    return '';
  }
  const facets: Record<string, string> = {};
  selectedFacets.forEach((facet) => {
    let value = facet.valueLabel ?? facet.facetValueText;
    if (facet?.type === 'range') {
      value = `${facet?.min}-${facet.max}`;
    }
    // Depending on when it's called, sometimes it comes as facet.valueLabel, other times it's facet.facetValueText
    if (!value) {
      return;
    }
    const key = FACET_PREFIX + facet.facetId;
    if (!facets[key]) {
      facets[key] = '';
    } else {
      facets[key] += '|';
    }
    facets[key] += value;
  });
  const params = new URLSearchParams(facets);

  return params.toString();
}

//Hook to keep facets synchronized with the URL.
export const useEnsureFacetUrl = (
  actions: SearchResultsWidget['ActionProps'],
  facets: SearchResponseFacet[]
) => {
  const router = useRouter();
  const selectedFacetsFromApi = useSearchResultsSelectedFilters();

  const selectedFacetsFromApiUrl = decodeURI(facetToUrl(selectedFacetsFromApi));

  const [prevFacetUrl, setPrevFacetUrl] = useState<string>();

  useEffect(() => {
    if (prevFacetUrl === undefined) {
      setPrevFacetUrl(router.asPath.split('#')[1] ?? '');
    } else {
      if (prevFacetUrl !== selectedFacetsFromApiUrl) {
        setPrevFacetUrl(selectedFacetsFromApiUrl);
        router.push(
          {
            pathname: window.location.pathname,
            // window.location.search includes the '?' if there is a querystring.
            // This caused extra '?' to be added each time.
            // If there is no querystring, there is no '?' so this issue wasn't caught earlier.
            query: window.location.search.replace(/^\\?/, ''),
            hash: selectedFacetsFromApiUrl,
          },
          undefined,
          { scroll: false }
        );
      }
    }
  }, [actions, facets, prevFacetUrl, router, selectedFacetsFromApiUrl]);
};
final step for set up the selected facet in url is using this hook inside your search component
// In your search component:
// To ensure that facets are synced with the URL:
  useEnsureFacetUrl(actions, facets);
to use as default selection you need one more configuration to convert url to facet value
export function urlToFacet(hash: string) {
  const query = new URLSearchParams('?' + hash);

  const facets: FacetValue[] = [];

  for (const [key, value] of query.entries()) {
    if (!key.startsWith(FACET_PREFIX)) {
      continue;
    }
    const facetId = key.split(FACET_PREFIX)[1];
    const valueArray = value.split('|');
    valueArray.forEach((x) => {
      if (facetId == filterByPrice.partyPrice) {
        const minMax = x?.split('-');
        facets.push({ facetId, min: Number(minMax[0]), max: Number(minMax[1]) });
      } else {
        facets.push({ facetId, facetValueText: x });
      }
    });
  }
  return facets;
}
use use it you can call it from useSearchResults in state config as selectedFacets
 state: () => {
      const hasWindow = typeof window !== 'undefined';
      const hash = hasWindow ? window.location.hash.replace(/^#+/, '') : '';
      const facetsFromUrl = urlToFacet(hash); // Get selected facets from the URL.
      return {
        selectedFacets: facetsFromUrl, //Set these as the initial selected facets.
      };
    },
Conclusion
With this implementation, you’ll have a fully functional range facet in your Sitecore Search-powered Next.js application. The range facet supports:
- Dynamic min/max values
- Visual range slider
- URL synchronization
- Clear formatting of selected ranges
- Proper integration with existing facet infrastructure
Happy coding! 🚀


Leave a comment