👋🏻 Hello
In this blog, you’ll take your first step with OrderCloud. You’ll learn some basics and see a demo on how to create your very first app using OrderCloud. So, let’s dive deep and explore the treasures of OrderCloud! 🪜 This is your first step towards mastering OrderCloud.
I’ll guide you through the essential concepts needed to create and connect your first OrderCloud app with Next.js. Let’s get started! 🏃🏻♂️
Creating Your First Marketplace
What is a Marketplace?
In the context of commerce, a marketplace is your central hub for managing everything—sellers, buyers, admins, products, and more.
Login/Sign-up in OrderCloud 🔑
You can create a free OrderCloud account and use the sandbox environment.
- Open the OrderCloud Portal.
- If you already have an account, log in with your credentials. Otherwise, register yourself by clicking here.

After a successful registration, you will be redirected to the OrderCloud Portal and see the OrderCloud Dashboard. Here, you can find previously created marketplaces and create a new one.
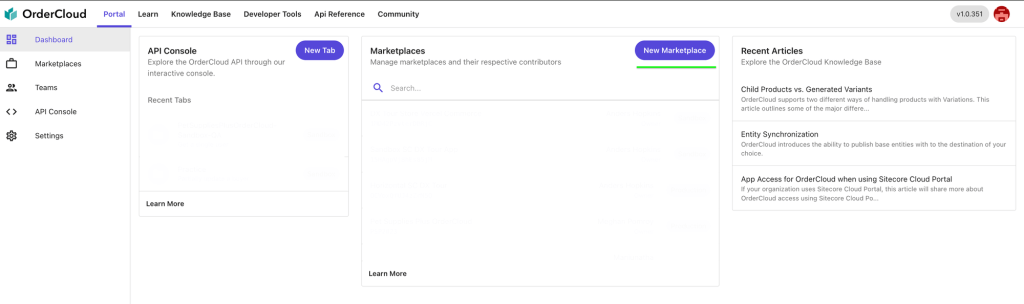
Click on the “New Marketplace” button to open the creation screen where you’ll provide essential information such as:
- Region
- Environment
- Marketplace Identifier
- Marketplace Name
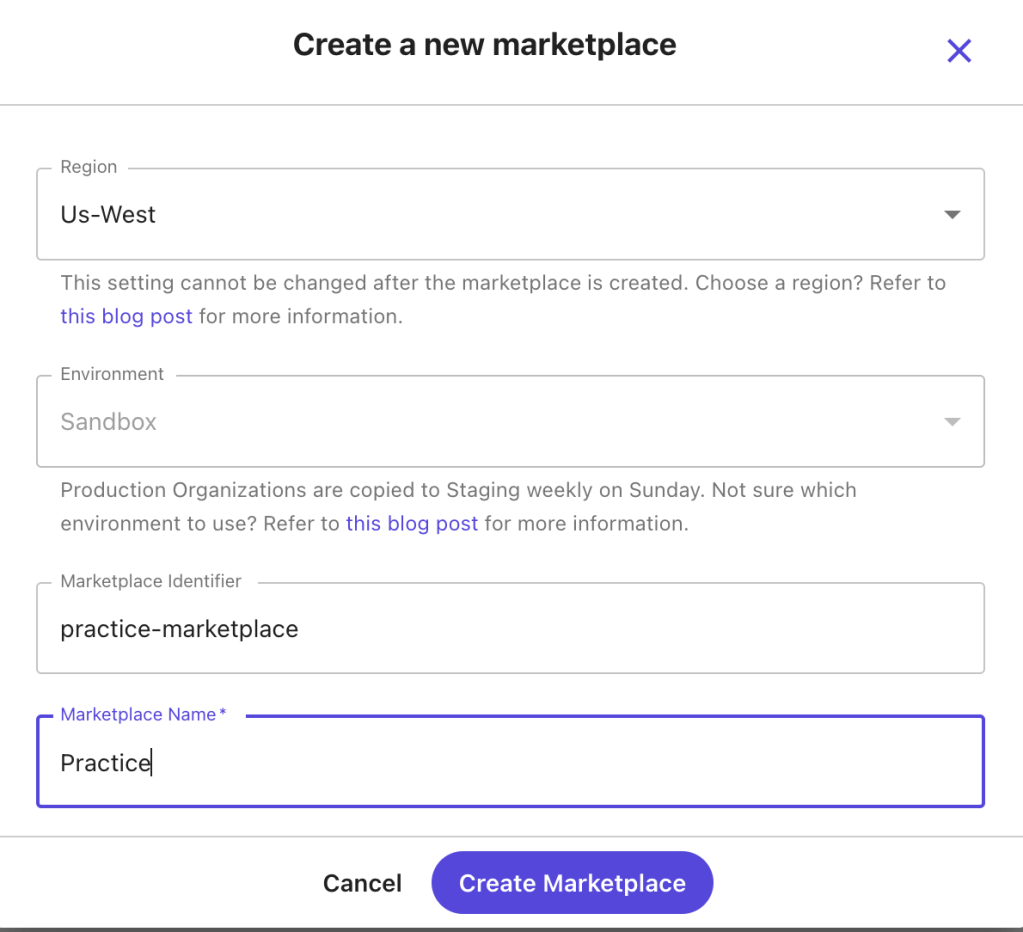
After filling in the details, click “Create Marketplace”. Your first marketplace is now successfully created, showing necessary information and an option to delete the marketplace.

Next, you will learn about other aspects of OrderCloud, such as security profiles, API clients, buyers, and users.
Security Profile 🔐
Security profiles are collections of roles, each containing specific permissions that control access to various parts of an application. Think of them as predefined sets of keys, each unlocking different doors.
Creating a Security Profile
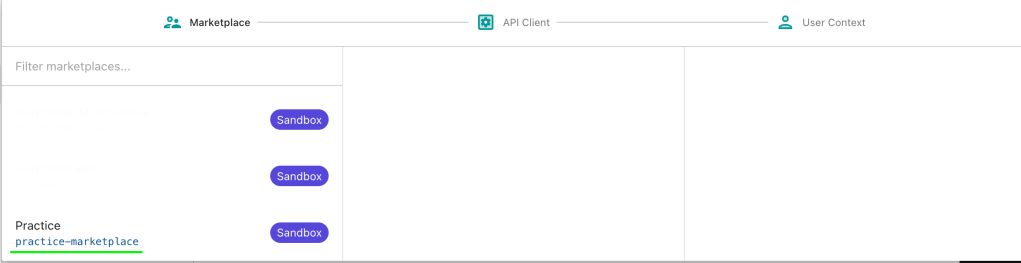
In the sidebar, find the “API Console” menu where you can interact with OrderCloud.

First, select a context (Marketplace). Choose the practice marketplace we created earlier.
- Select the “Security Profile” option.
- Click “Create New Security Profile”.

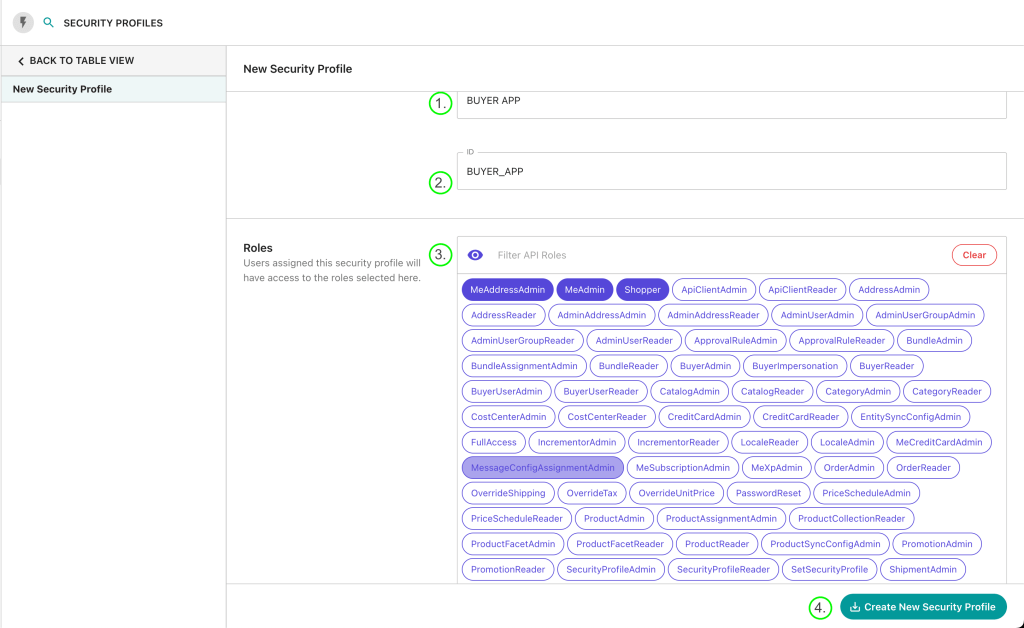
Here, we’ll create a security profile for buyers and assign specific roles, such as accessing the commerce app, creating user profiles, and viewing product lists and details.
- Name: Provide a name for your security profile (e.g.,
BUYER APP). - ID: Provide a unique ID for your security profile.
- Assign the necessary roles for a buyer user and click “Create New Security Profile”. I’ve assigned three roles which are essential for a buyer.
API Client
API Clients are unique gateways to your marketplace’s data. They control how different parties (like customers, admins, or suppliers) interact with your data. Each API Client has specific rules and permissions determining who can access what information and how.
Creating an API Client
Let’s create an API Client to access our OrderCloud app.
- Go to the “API Client” menu and create a new API Client.

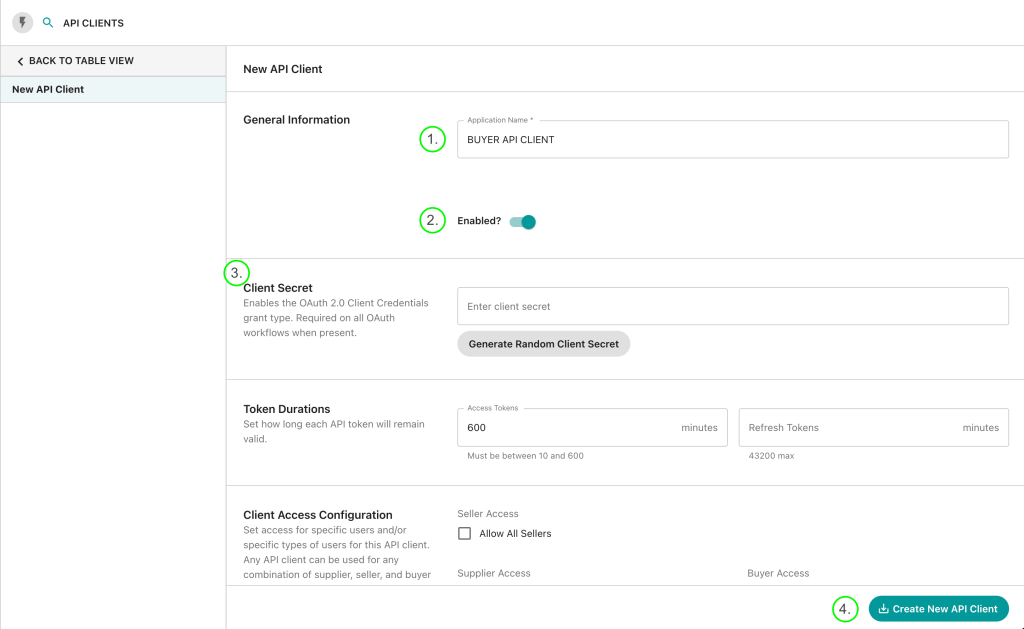
Provide the following information:
- Name: Provide a name (e.g., BUYER API CLIENT).
- Enabled: Set to True (default is True, can be disabled for specific purposes).
- Client Secret (Optional): If provided, it also needs to be configured in your frontend app.
- Token Duration: Set expiration times for access and refresh tokens (default: 600 minutes for access tokens and 0 for refresh tokens).
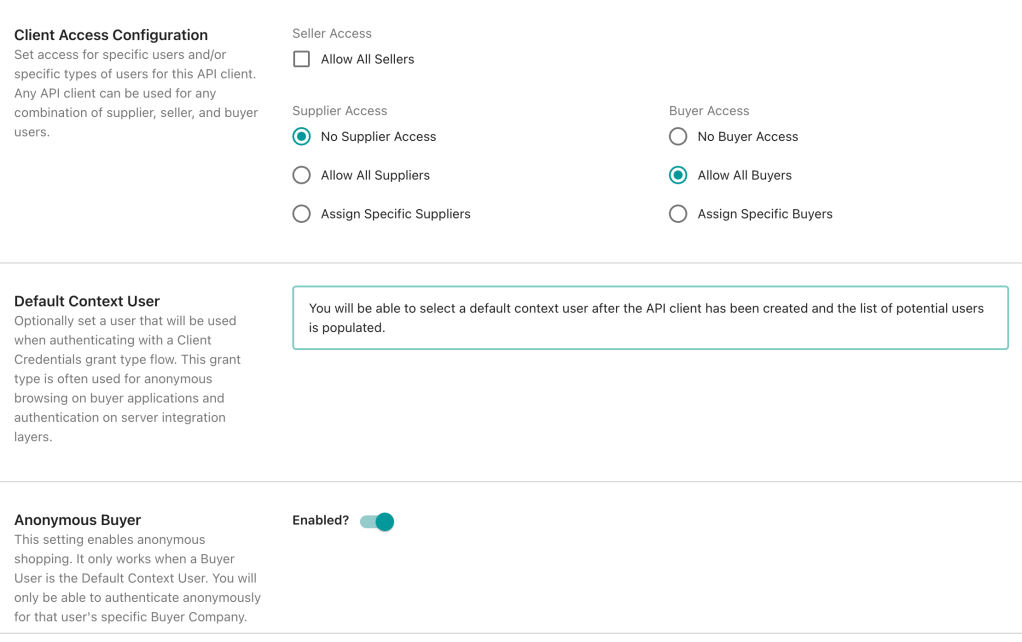
Client Access Configuration: Select client access for specific users. Here, I selected “No supplier” (no seller user can use this API Client) and “Allow All buyers” (all Buyer users can use this client ID).
Default Context User: Provide a default user (used to generate the token to access the buyer app) which we will create next.
Anonymous Buyer: Allows anonymous buyer users.
Finally, click on the “Create New API Client” button.
Creating a Buyer and Their User
Buyers
A user group under which you can create users who can access an application. For example, we are end users for companies like Amazon, Flipkart, Myntra, etc. Here, this is a user group for all buyer users, meaning if we assign a security profile to this buyer group, all users created under it will automatically get their roles.
Creating a Buyer Group
To create a Buyer Group:
- Navigate to the “Buyer” menu in the sidebar.
- Select an option from the API request.
Provide the following information:
- ID: Provide a unique ID (e.g., BUYER GROUP).
- Active: Set to true (default is false, ensure it’s true to access the end-user app).
- Name: Provide a respective name and hit the send button.

You have successfully created a Buyer Group. Now, let’s move to the next step: creating a user for our app.
Assigning a Security Profile to Buyer Group
Assign a Security Profile to the Buyer Group, meaning users created under this group will automatically receive the roles specified in the BUYER APP Security Profile.
Go to the Security Profile and then select the below request

Then Assign BUYER_APP Security profile to the BUYER_GROUP API Client.

Creating a Buyer User
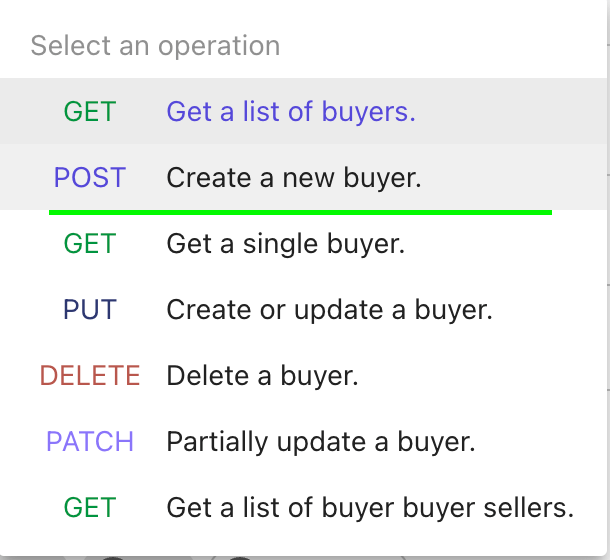
Under the Buyer menu, you can see an option to create a new buyer user.

- Select a POST request to create a new user.
- Provide necessary information like Name, ID, Active status, Username, Password, First Name, Last Name, Email, and Phone. There is also an Extended Properties (xp) field for additional information like user image, gender, birthdate, etc.
This user has the AvailableRoles property, provided in our security profile.
😊 Hope you’re enjoying the read. Let’s move to the next step.
Connecting Your Next.js App with OrderCloud
OrderCloud provides a starter kit to easily create a new application. Clone it from the GitHub link.
- Open the folder in your favorite IDE.
- Go to your project directory.
Folder structure:

Then, Create a new .env file and paste the following variables:
NEXT_PUBLIC_OC_CLIENT_ID=6DAEFB90-A497-4532-907E-9EB5F9EAE7D5
NEXT_PUBLIC_OC_SCOPE=Shopper,MeAddressAdmin,MeAdmin
NEXT_PUBLIC_OC_BASE_API_URL=https://sandboxapi.ordercloud.io
NEXT_PUBLIC_OC_ALLOW_ANONYMOUS=false
Provide the API Client ID you created for the buyer.
Run the npm run dev command, and open localhost:3000.
If you face an error like below, you might have missed selecting a default context user in your API Client.
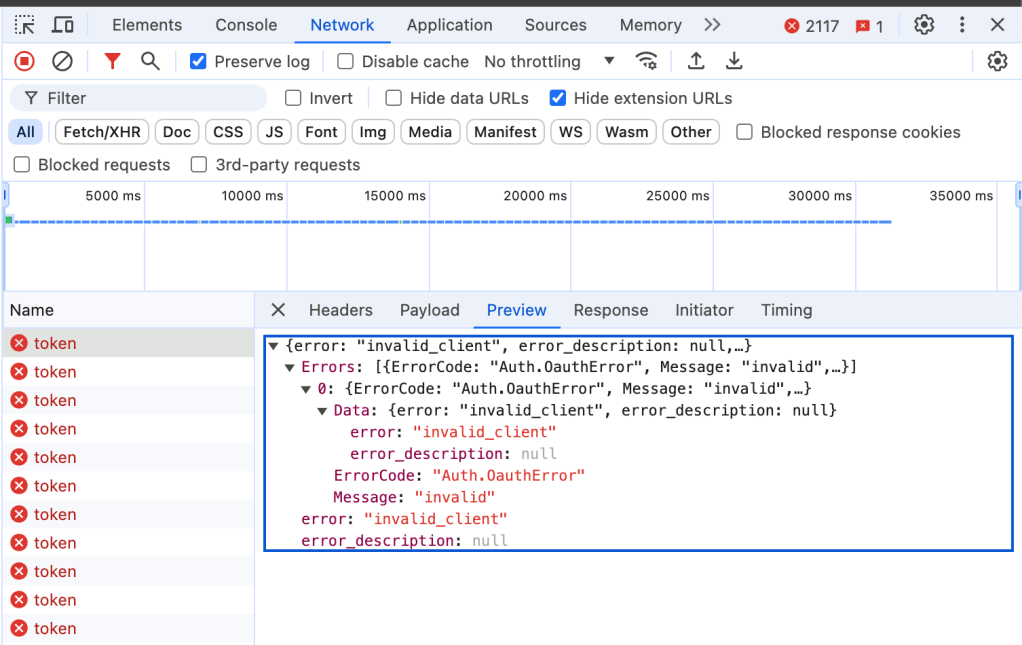
To resolve this, assign a default context user in your API Client. I created a new user under the same Buyer Group and assigned it to the API Client.

After restarting the app, you should see the following screen:
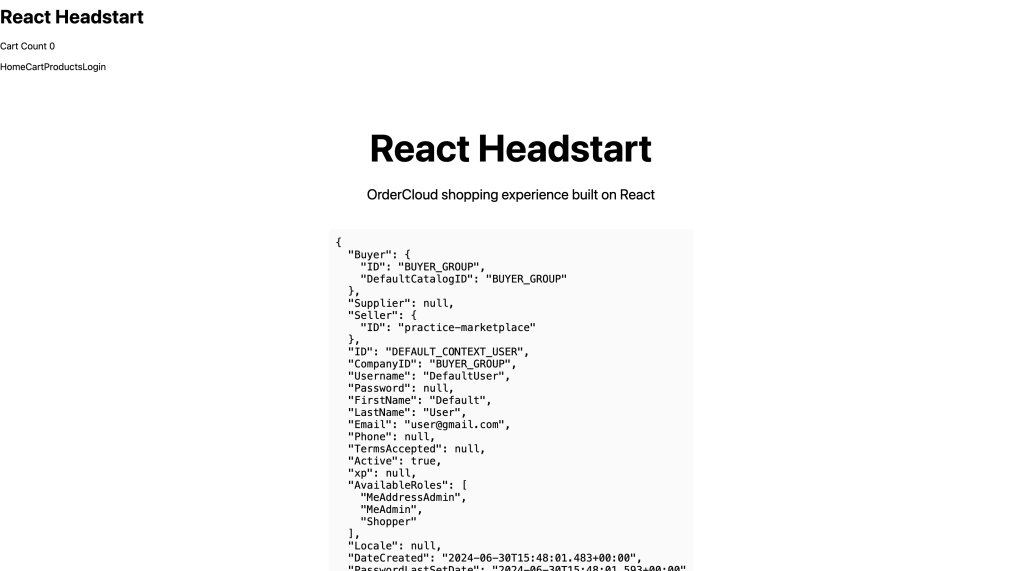
Congratulations! You have created your first OrderCloud app.
References
I hope you found this guide helpful.


Leave a comment